Step by Step Guide to Install Ubuntu Server 24.04
 Suresh Thapa
step by step guide to install ubuntu server 24.04
Here’s a clean, no-nonsense, step-by-step you can follow to install Ubuntu Server 24.04 LTS (Noble) on a physical machine or VM. I’ll keep it practical and add a few post-install hardening steps you’ll likely want anyway.
1) Prep: downloads & USB
What you need
- 1× USB drive (≥4 GB)
- The ISO:
ubuntu-24.04.x-live-server-amd64.iso - A machine/VM to install to (UEFI recommended)
Download ISO
- From ubuntu.com → Server → 24.04 LTS.
Physical machine Requiremnt
CPU: 1 GHz or better (a 2 GHz dual-core processor is recommended).
RAM: 2 GB minimum (4 GB recommended).
Disk Space: 2.75 GB minimum (25 GB recommended).
Network Connection: A network connection is needed for the installation process.
Bootable Media: A USB port or DVD drive to boot from the installation media.
Virtual machine Requiremnt (Proxmox/VMware/VirtualBox)
- Resources: 2 vCPU, 2–4 GB RAM, 20–40 GB disk (grow as needed).
- Disk: Use VirtIO SCSI + SSD emulation if available.
- NIC: VirtIO/VMXNET3 for performance.
- Boot: UEFI with Q35 chipset (where supported).
Make a bootable USB
- Windows (Rufus)
- Open Rufus → Select your USB
- Select the ISO
- Partition scheme: GPT; Target system: UEFI (non-CSM)
- Start.
- Cross-platform (balenaEtcher): Select image → Select USB → Flash.
- Linux (dd)
sudo dd if=ubuntu-24.04*.iso of=/dev/sdX bs=4M status=progress oflag=sync
# replace /dev/sdX with your USB device (NOT a partition like /dev/sdX1)
2) Firmware & boot
- In your BIOS/UEFI, set:
- Boot mode: UEFI
- Boot order: USB first
- (Optional) Enable virtualization (Intel VT-x/AMD-V) if this will run VMs/containers.
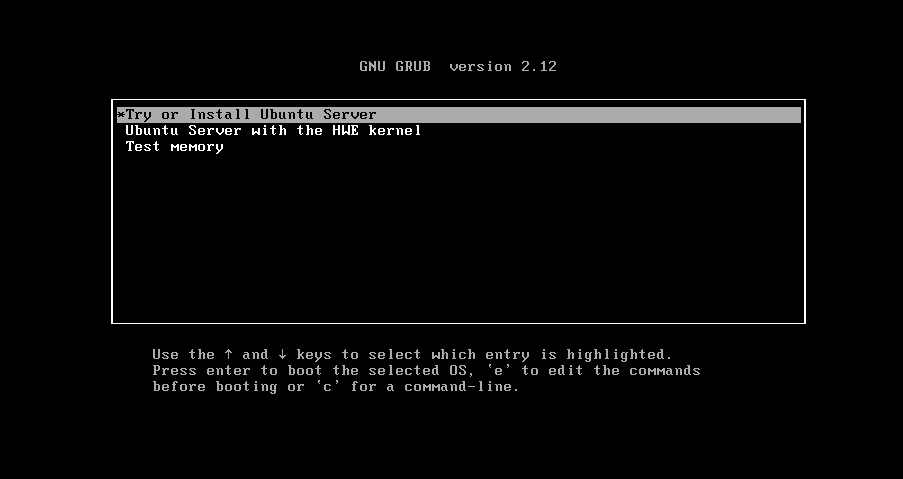
- Insert the USB and boot it. Choose Try or Install Ubuntu Server.
3) The installer (screens you’ll see)
Work through these in order:
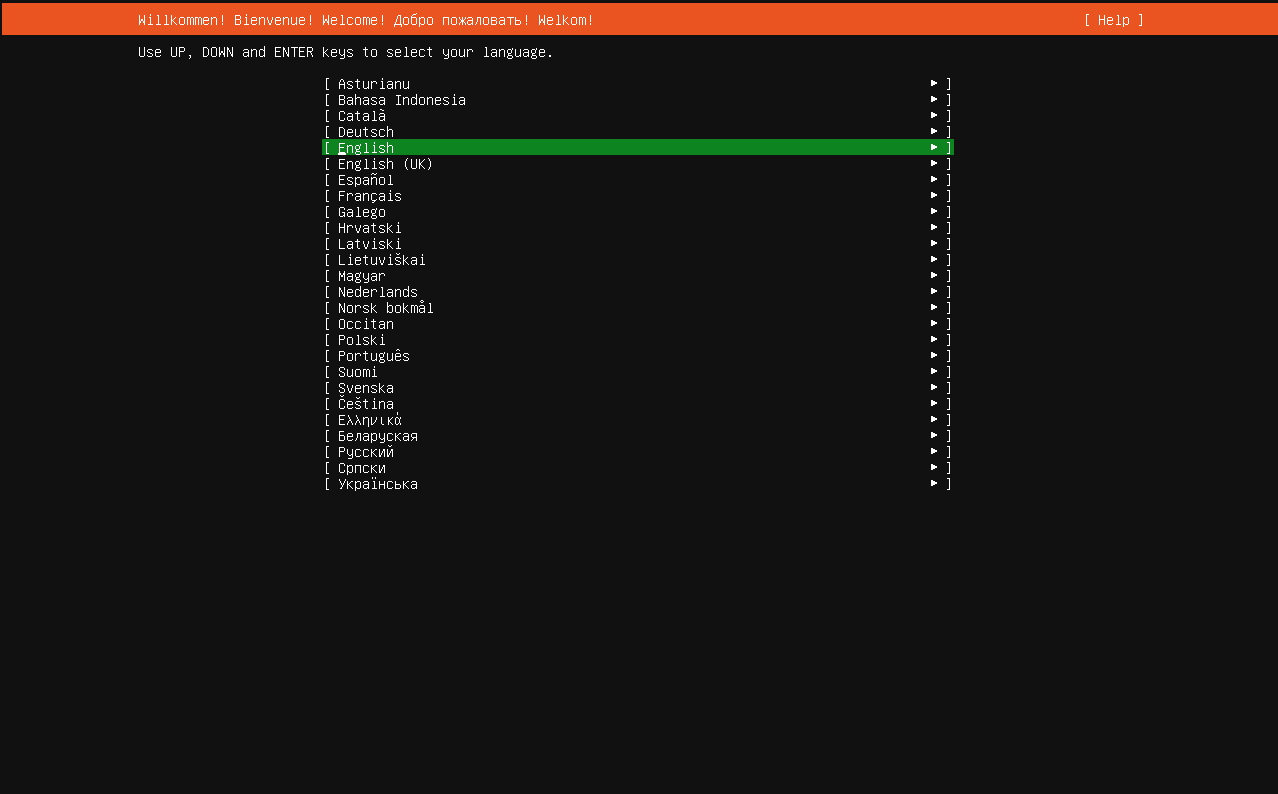
Language → choose your language.
Keyboard → detect or pick layout.

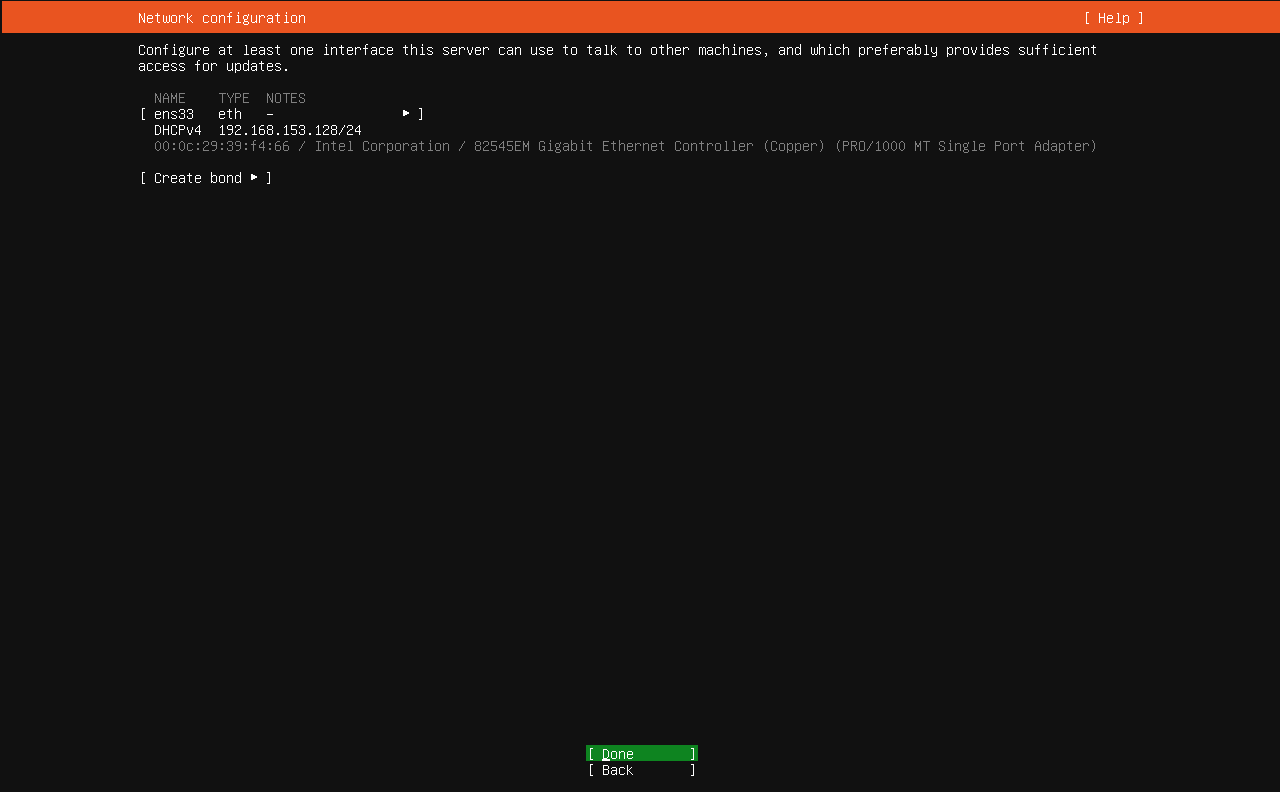
Networking
- If DHCP is fine, continue.
- For a static IP now: select the interface → Edit IPv4 → Manual → enter address, gateway, and DNS.
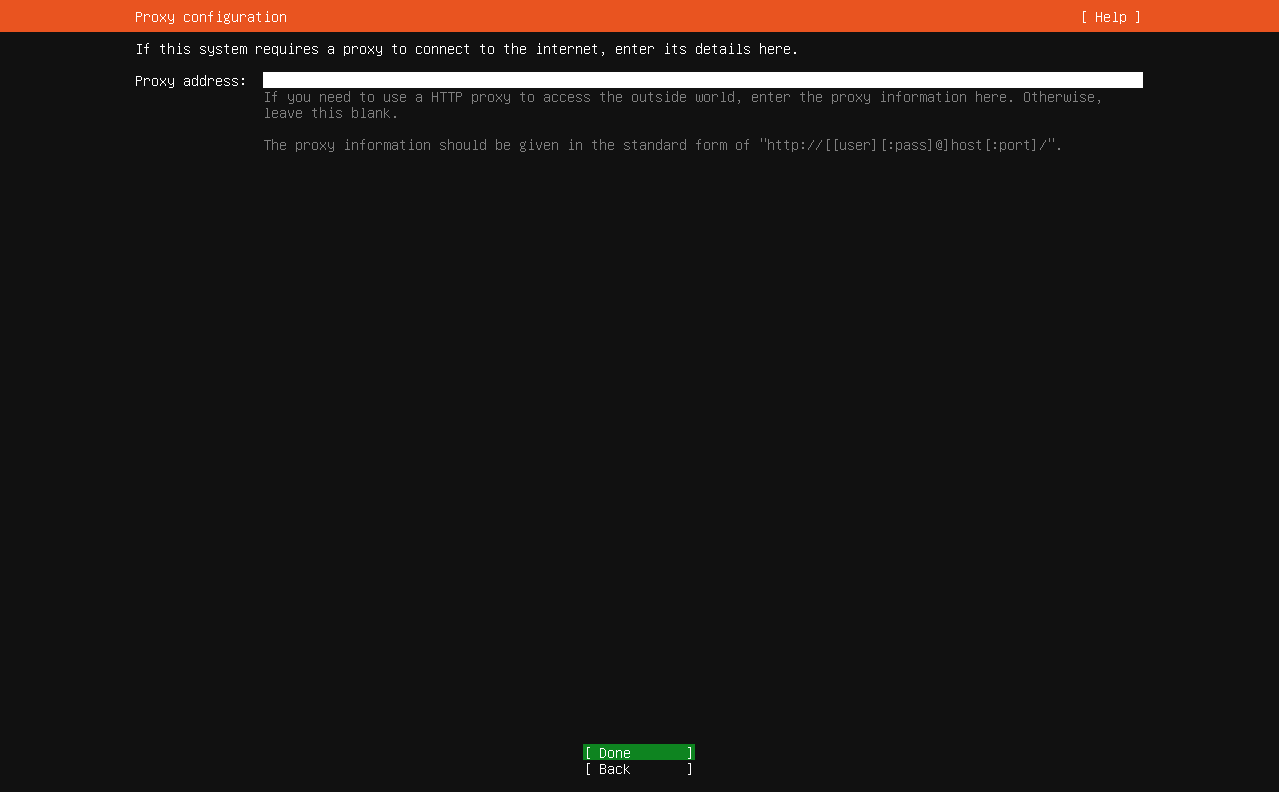
Proxy → leave empty unless you use one.
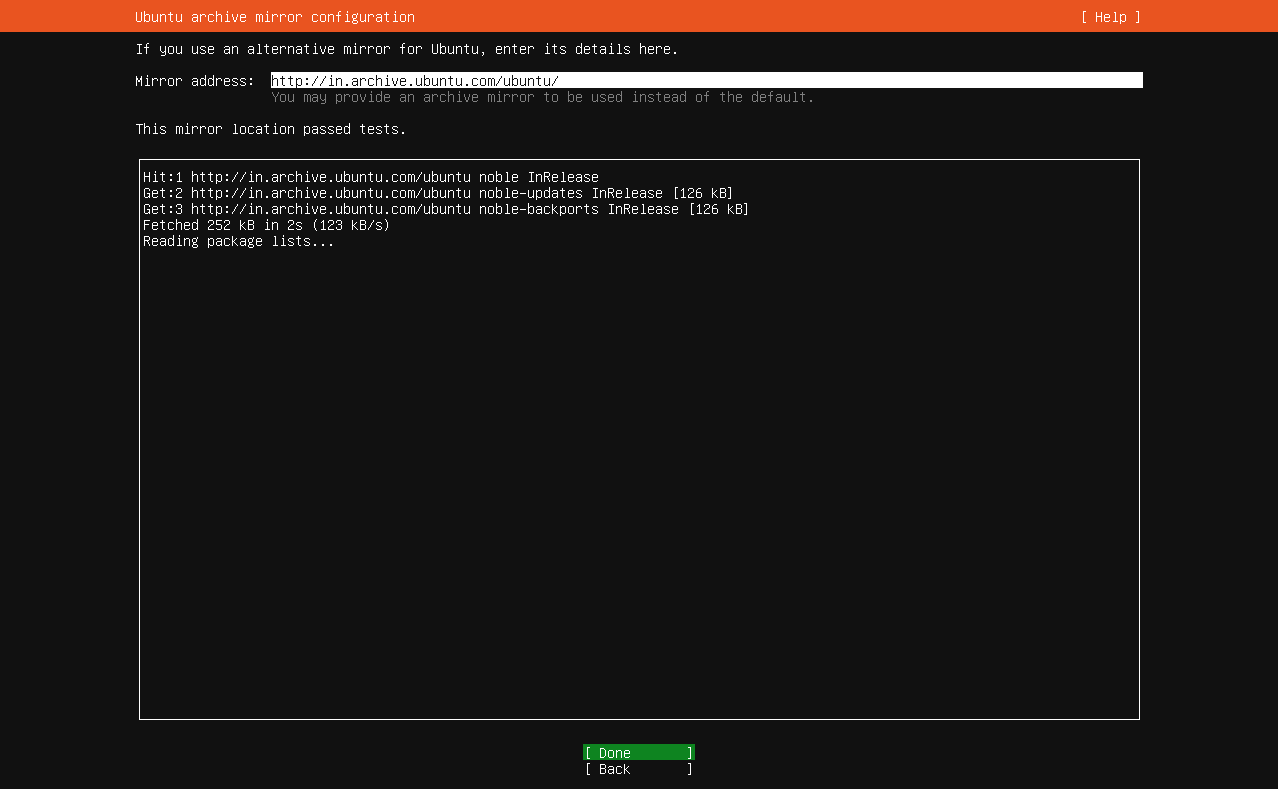
Mirror → accept default (usually fine).
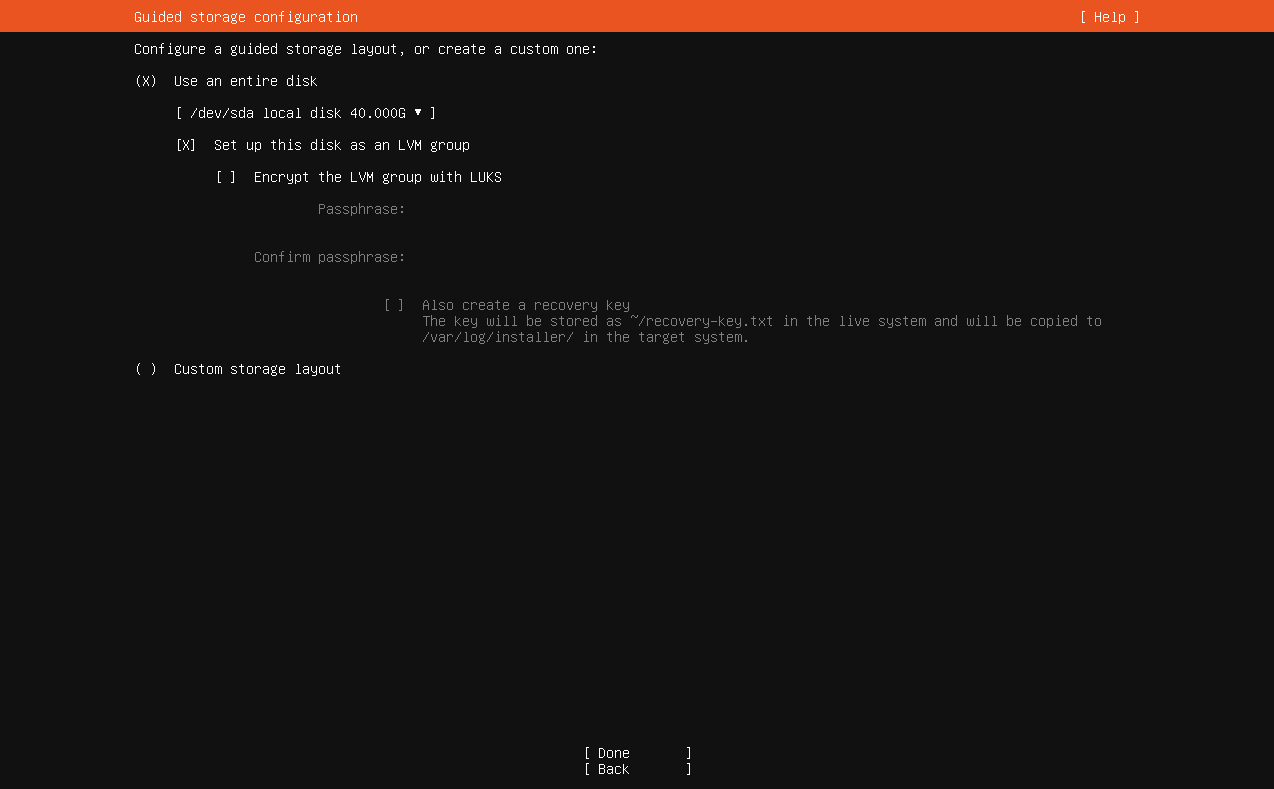
Storage
- Easiest: Use an entire disk → (optional) Set up LVM (recommended for flexibility).
- For encryption: choose Encrypt the LVM group (you’ll set a passphrase).
- Manual partitioning if you need custom layouts/RAID/ZFS.
- Default filesystem for root is ext4 (sensible for most).
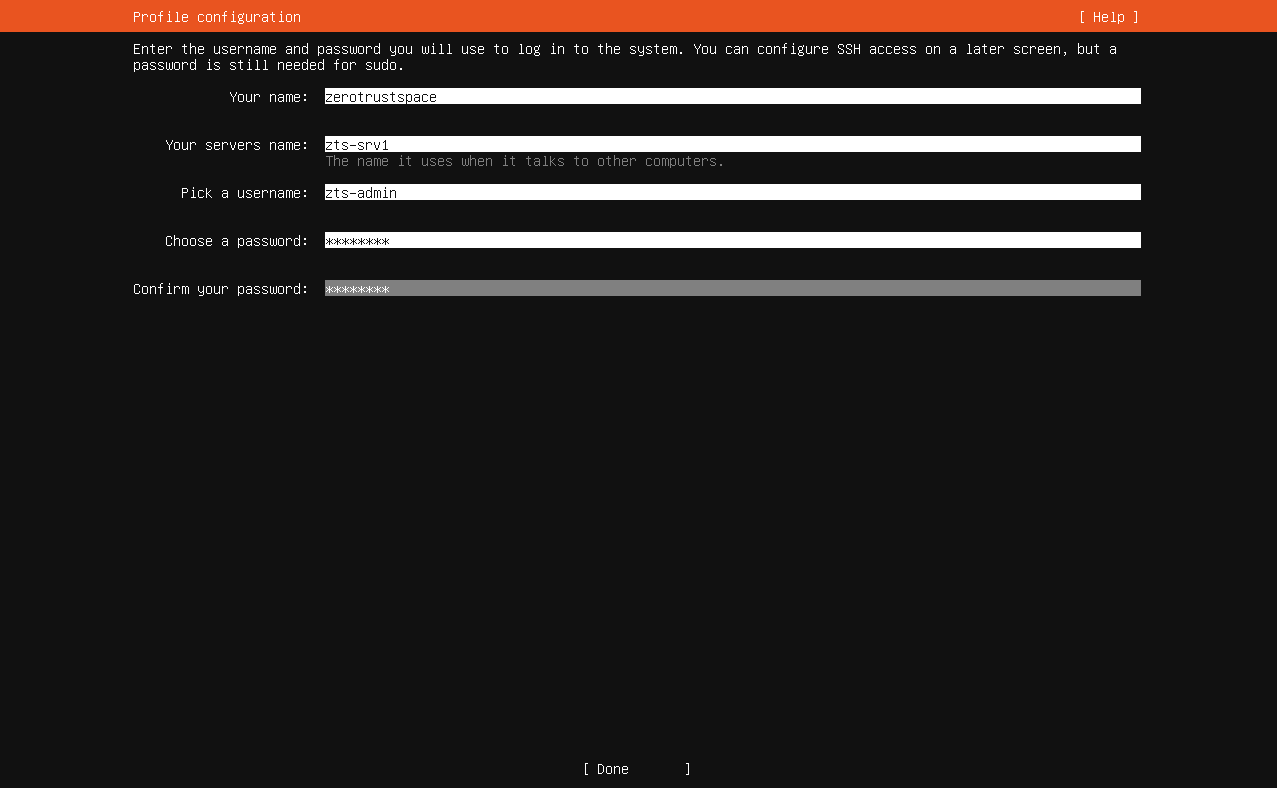
Profile setup
- Your full name, username, password.
- Server name (hostname) – pick something meaningful (e.g.,
srv-app-01).
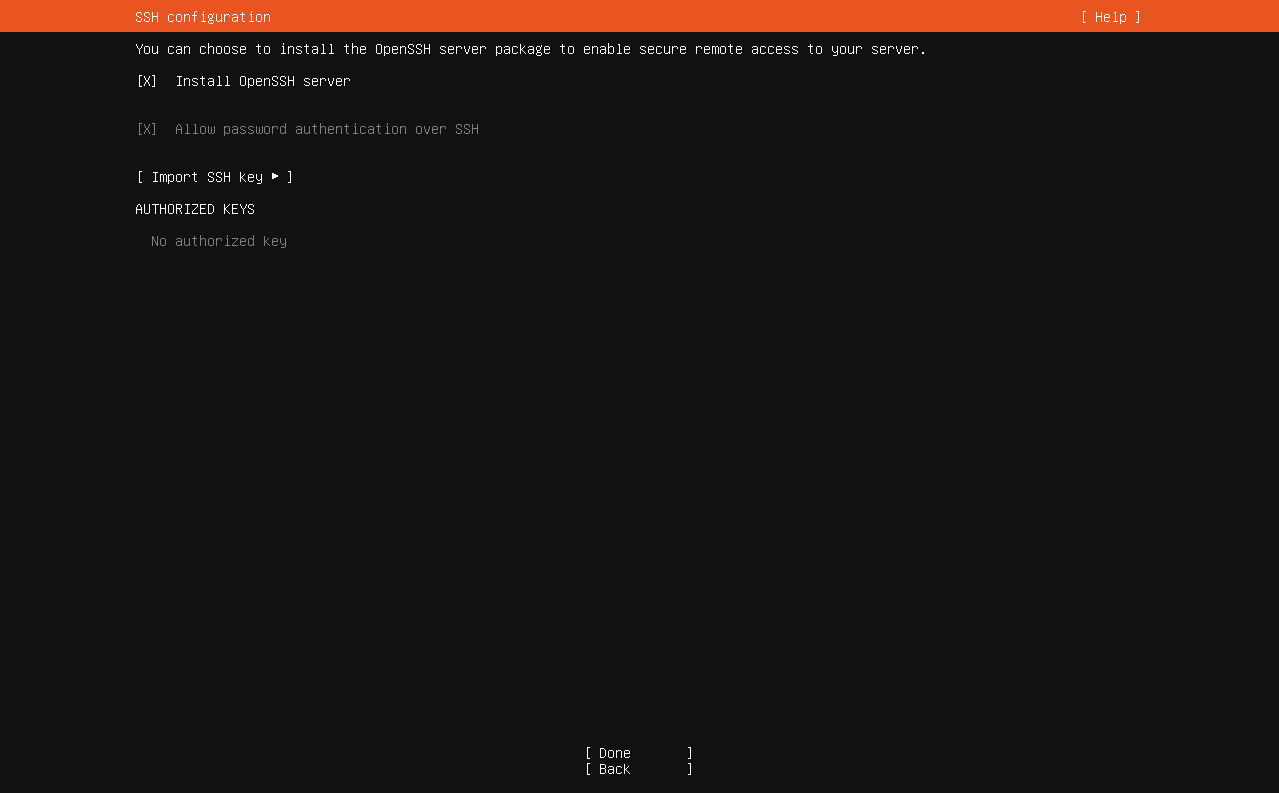
SSH setup
- Install OpenSSH: Yes (so you can manage remotely).
- You can also import SSH keys from GitHub/Launchpad or paste a key.
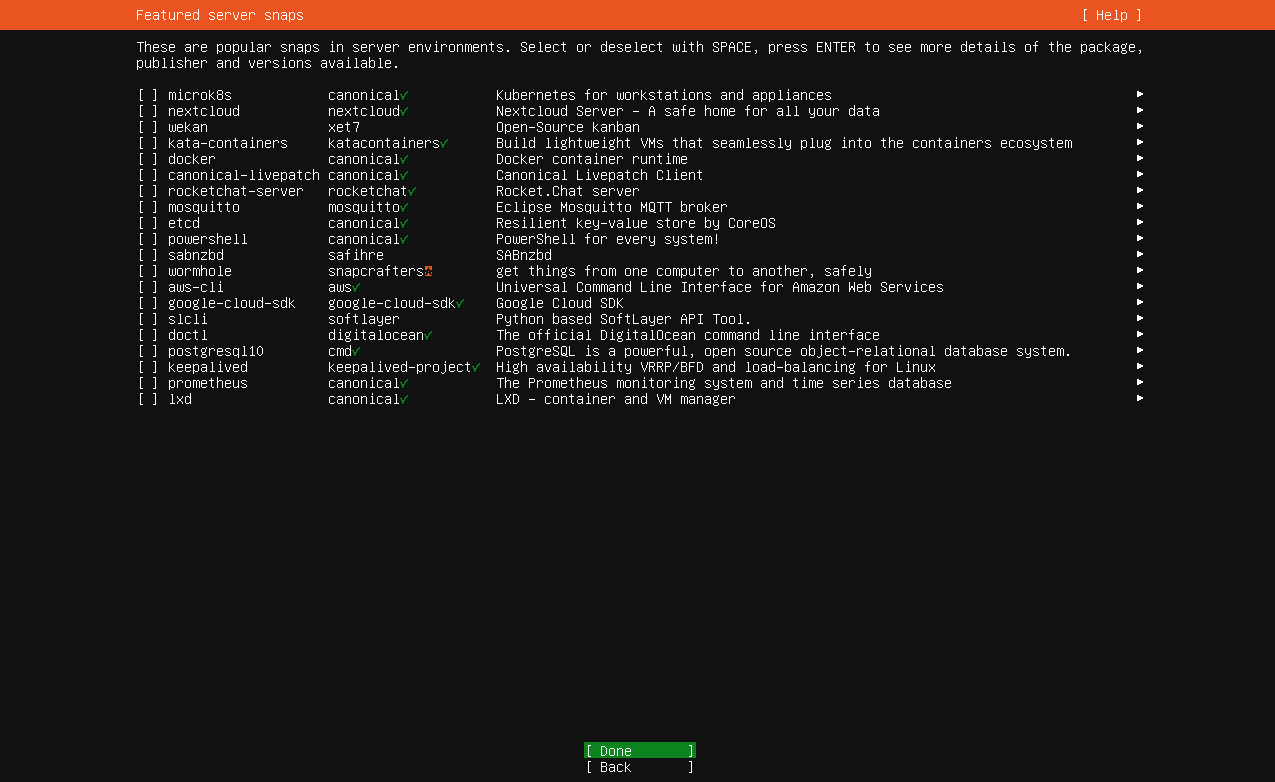
Featured Server Snaps
- Optional (e.g., docker, microk8s, nextcloud). You can skip and install later.
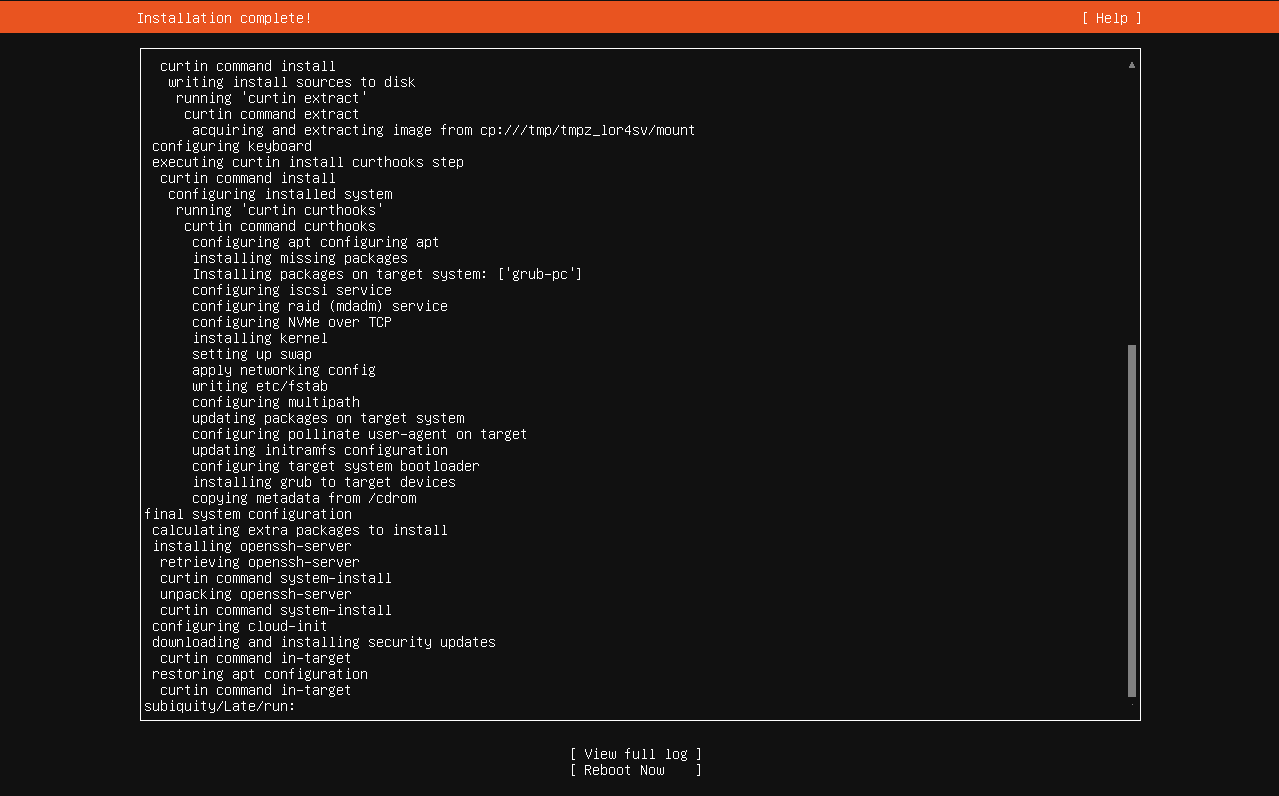
Confirm partitions → Install.
- After install completes, remove the USB and Reboot.
4) First boot & essentials
Log in on console or via SSH:
ssh youruser@server-ip
Update immediately
sudo apt update
sudo apt full-upgrade -y
sudo reboot
Basic tools (handy)
sudo apt install -y curl ca-certificates git htop vim ufw fail2ban
Firewall (UFW)
sudo ufw allow OpenSSH
sudo ufw enable
sudo ufw status
Timezone & NTP (India example)
sudo timedatectl set-timezone Asia/Kolkata
timedatectl
5) Configure a static IP later (Netplan)
If you didn’t set static networking during install, do it now. Find your interface:
ip -br a
Edit the netplan file (name may vary, e.g., /etc/netplan/01-netcfg.yaml):
# /etc/netplan/01-netcfg.yaml
network:
  version: 2
  ethernets:
    enp0s31f6:
      dhcp4: false
      addresses:
        - 192.168.1.20/24
      routes:
        - to: default
          via: 192.168.1.1
      nameservers:
        addresses: [1.1.1.1, 8.8.8.8]
Apply:
sudo netplan apply
6) Quick trouble-shooting
- No network after netplan edit →
sudo netplan tryto test safely; fix YAML spacing. - SSH refused → check
sudo systemctl status ssh, firewall rules, and thatPasswordAuthenticationisn’t disabled unless keys work. - Boot issues after changing disks/RAID → verify boot order in UEFI, re-create GRUB if needed using the live ISO’s “Rescue” mode.